How-to guide: All Garmin Oregon 700 / 750 / 750t settings explained! Recommendations, tips and informations for beginners and advanced users – your guide for a perfect Oregon 7×0 setup!
Tip: Before starting, back up your device. Connect the Oregon to a PC (USB cable is in the box), activate the mass storage mode (as described below, "System") and copy all files and folders to a save place on your hard disk.
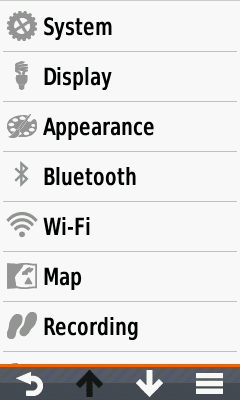
Garmin Oregon 700 750 750t Settings 1
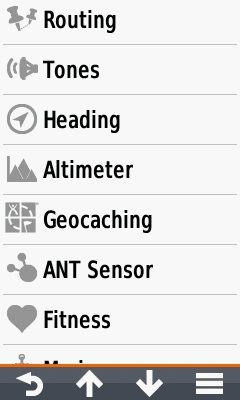
Garmin Oregon 700 750 750t Settings 2
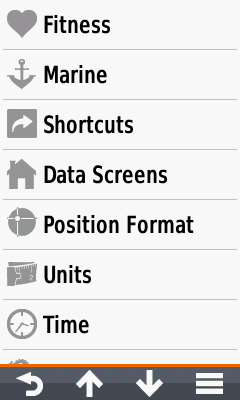
Garmin Oregon 700 750 750t Settings 3
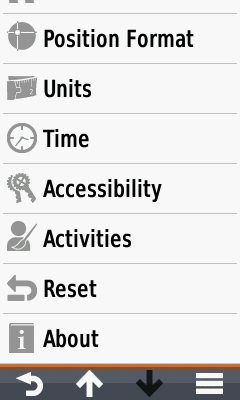
Garmin Oregon 700 750 750t Settings 4
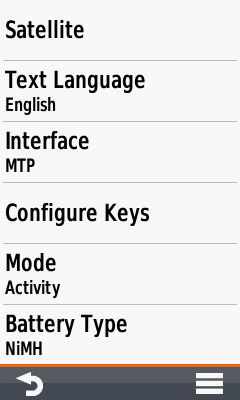
Satellite
Choose "GPS + GLONASS", "GPS" only for more battery life.
WAAS/EGNOS can provide a better accuracy in certain situations and is recommended for pilots and mariners. For outdoor activities you usually do not need WAAS/EGNOS signal corrections (WAAS is only available in North America, EGNOS in Europe).
BUT: Activate it, if your preference is "Enable all and hope the best!" (= GPS / GLONASS / WAAS / EGNOS).
Text Language
Your choice
Interface
"MTP" or "Garmin Spanner" is recommended.
MTP (Media Transfer Protocol):
- When connecting to a PC, the Oregon activates mass storage mode, you get access to the internal and external storage.
- In Windows explorer it appears like a smartphone, you do not need the safely remove function in Windows.
- The gps device is supplied with energy when connecting to an external power source (e.g. AC charger).
Garmin Spanner:
- The gps device is supplied with energy when connecting to an external power source (e.g. AC charger).
- Connecting the handheld to a PC you get the screen "USB Cable Detected. Would you like to go to Mass Storage?" (screenshot below). "Yes": Activiting the mass storage, you get access to the file system and can copy data or install maps (e.g. with Garmin BaseCamp); "No": Device is powered by the external source.
Configure Keys
Configuration of the power key and the user key; you can add different functions to the keys. Depends on your personal preferences and the activity.
Mode
Select between "Activity" (standard setting) and "Classic" (our preferred mode). In the classic mode you can not choose between the different activities directly after the start up procedure. The interface is similar to the Oregon 6×0 when choosing the activity mode and you do not get the annoying pop-up for starting the track log!
Battery Type
Depends on your preferred battery type (menu is disabled when using the Garmin NiMH battery pack!):
- Alkaline (not recommended)
- Lithium (recommended for cold environments and long run-times), e.g. Energizer AA Ultimate
- NiMH (for daily use)
- Precharged NiMH, for NiMH batteries purchased as precharged (LSD, Low Self Discharge batteries), highly recommended, for daily use: e.g. Panasonic Eneloop AA
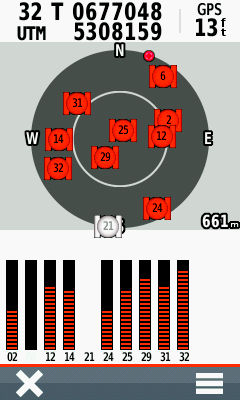
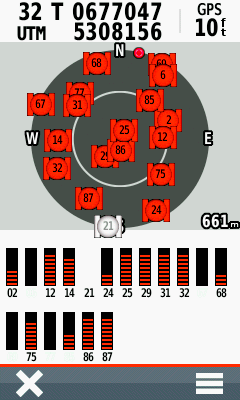
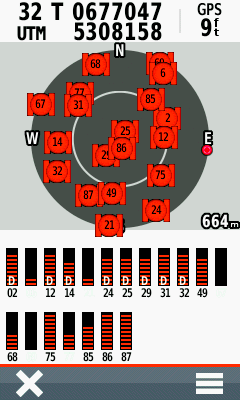
Screenshots (left to right)
- Satellites: 02 – 32 GPS
- Satellites: 02 – 32 GPS, 68 – 87 GLONASS
- Satellites: 02 – 32 GPS, 49 EGNOS, 68 – 87 GLONASS; "D"device receives and uses EGNOS signal corrections
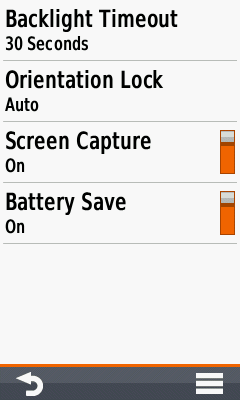
Backlight Timeout
Turns the backlight off after a given time. Choose a timeout as short as possible to get more battery life, timeout should depend on your activity.
Orientation Lock
"Lock Portrait" is the best choice for most activities.
Screen Capture
Capturing screenshots, turn "off" except you need it.
Tip: after a tour you can capture your trip computer for saving the statistics (screenshots are saved in the device folder "GARMIN\SCRN")
Battery Save
The display turns completely off when you choose "On", depending on the time defined in "Backlight Timeout". Press a key for turning the display on again.
Recommendations: Activate e.g. for hiking (when you are rarely looking on the display), disable e.g. for mountain biking (when you want to have a quick glance on the display, in addition set "Backlight Timeout = Stays On").
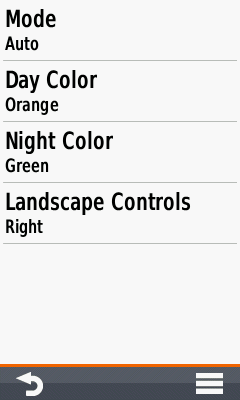
Mode
Choose between "Auto, Day, Night":
- Auto: Automatic switch between day / night colors (at sunset/-rise)
- Day: color as defined in "Day Color"
- Night: color as defined in "Night Color"
Day Color
It’s your choice
Night Color
It’s your choice
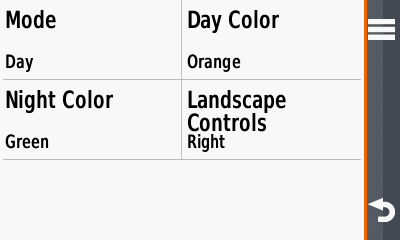
Landscape Controls
Position of controls when the display is in landscape mode, it’s your preference (screenshot below).
Screenshot
- Landscape controls right
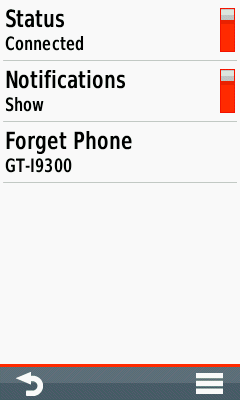
Status
Enable for connecting a smartphone
Notifications
Enable / disable notifications on your Oregon
Forget Phone
Remove connection to your smartphone

Wi-Fi
Enable / disable Wi-Fi (disable when not in use)
Add Network
Add new Wi-Fi network
Connected Network
Connected Wi-Fi network (by tapping you can remove it)
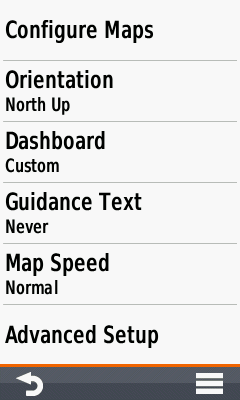
Configure Maps
Enable/Disable the installed maps (do not disable the worldwide basemap, it is necessary for the weather radar)
Orientation
Map orientation, depending on your activity (and profile):
- North Up: North is always at the top of the display / page, independent of the device orientation.
- Track Up: Direction of travel is always at the top of the page (recommended for active navigation and / or activities like cycling and geocaching)
- Automotive Mode: Three dimensional look, direction of travel is always at the top of the page (recommended for automotive use)
Tip: You can change the orientation (north up / track up) by tapping the small white arrow on the map screen.
Dashboard
Choose between different informations (data fields, graphics) on top of the map. Depending on your activity and preferences, e.g. "Geocache" for geocaching.
Our preference is "Custom": "When Navigating > Small Data Fields", "When Not Navigating > None" (when you navigate you get four data fields; when not navigating the map is completely visible).
Screenshots below
Guidance Text
When navigating, a guidance text with informations like "Arriving at …" appears at the top of the map.
"Always" should be avoided, because the text "Ready to Navigate" covers the map, even without active navigation. Best choices are "When Navigating" or "Never", depending on you activity.
Map Speed
"Normal“, saves battery life and is sufficient
Advanced Setup
See next section
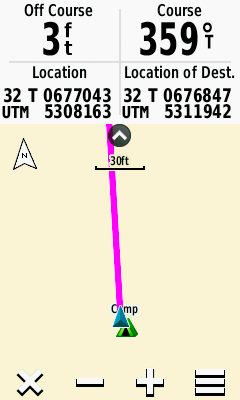
Dashboard: small data fields
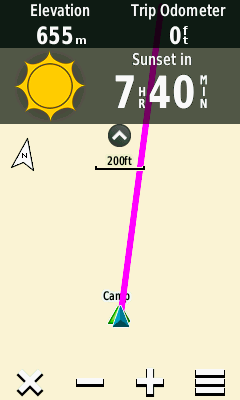
Dashboard: recreational
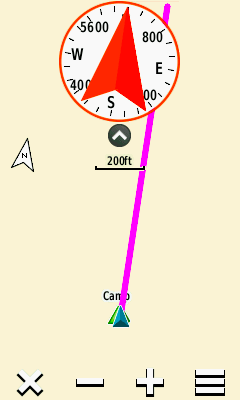
Dashboard: compass
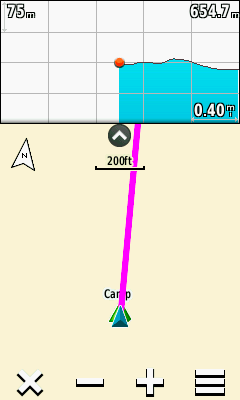
Dashboard: altimeter
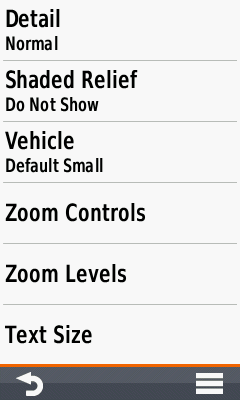
Detail
"Normal" map detail level is usually enough
Shaded Relief
The shaded relief provides a better visualization (e.g. hill-shades), but in deep woods the darker map screen can reduce the visibility.
For a better readability use "Do not show", otherwise choose "Show if Available" or at least "Auto" (shaded relief disappears when zooming in the map).
Screenshots below!
Vehicle
Symbol for the current position, your choice
Zoom Controls
- Auto Zoom: turn it off (except for car driving)
- Position of the +/- buttons for the map zoom (portrait mode only), turn off when you prefer multi-touch gestures.
- Position of the +/- buttons for the map zoom (landscape mode only), turn off when you prefer multi-touch gestures.
Zoom Levels
Use "Auto"
Text Size
Use "Small" or "Medium", "Large" is usually too much.
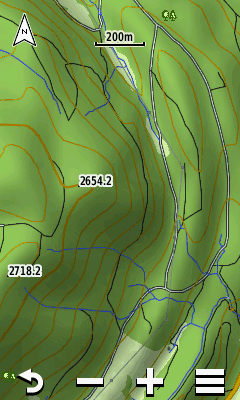
Shaded relief on
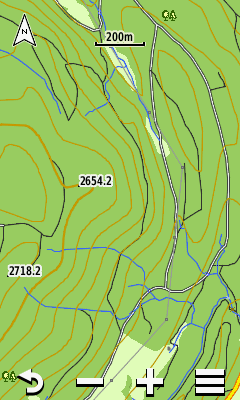
Shaded relief off
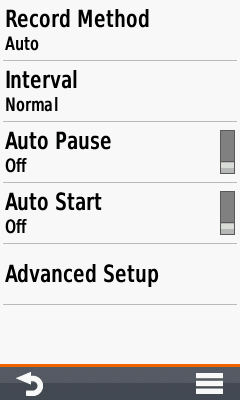
Record Method
Recommendation: "Auto" (good choice for most outdoor activities), "Distance" is recommended for hiking, "Time" when using the device as a data logger for geotagging.
Interval
Settings for the track log recording rate depend on the "Record Method", the combination "Auto / Normal" is sufficent, for hiking e.g. "Distance / 10 m / 0.01 mi"
Auto Pause
When using "Auto Pause", the device pauses tracking below a speed of 2,4 km/h / 1,5 mph (default speed can be customized). Should be disabled e.g. when hiking slowly up steep mountains.
Auto Start
Starts recording automatically after power on and acquiring the GPS position.
Tip: When using "Auto Start", reset the activity (track log) immediately before starting the tour (first determined position might be some meters off your current position).
Advanced Setup
Next section!
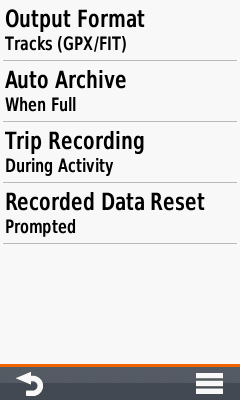
Output Format
"Activities (FIT)" or "Tracks (GPX/FIT)"; GPX/FIT is the recommended setting for all activities.
Worth knowing:
- "Activities (FIT)": After saving the current activity, you find a new activity in the "Activity History".
- "Tracks (GPX/FIT)": After saving the current activity, you find a new track in the "Track Manager" and a new activity in the "Activity History".
- The "Track Manager" has some more options compared to the "Activity History" (color of a track in the map, show / do not show a track on the map).
- Tracks and activities can be selected in the "Where To?" menu for navigation ("Tracks", "Recording").
- Activities in the "Activity History" can be saved as tracks; after saving they are listed in the "Track Manager" and can be selected in the "Where To?" menu for navigation.
- Track files are saved in the device folder "Garmin\GPX" in the gpx file format (you have access to the folders when the device is in mass storage mode).
- Activity files are saved in the device folder "Garmin\Activity" in the fit file format.
Auto Archive
Recommended "When Full"
Trip Recording
Choose "When Tracking" (trip computer recording is active when starting an activity (= track log), suitable for most activities); "Always"might be interesting for activities like geocaching (trip computer is always active, independent from the track log).
Recorded Data Set
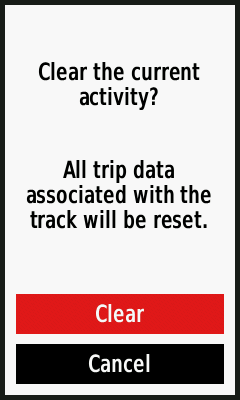
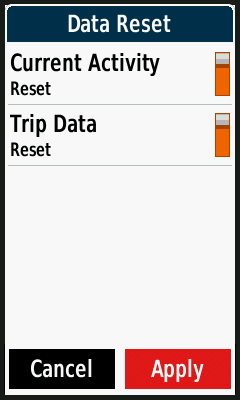
"Prompted" is recommended (you can clear the current activity (= track log) and/or the trip data, independent of each other); "Track and Trip": you clear the current activity and the trip data together.
Screenshots below
Screenshots (left to right)
- Recorded Data Reset: "Activity and Trip"
- Recorded Data Reset: "Prompted"
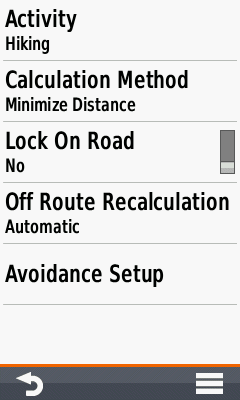
Activity
Choose your preferred activity for calculating the route to the destination (dependent on the current activity, e.g. "Hiking" for a hiking activity)
- "Direct Routing": straight line from your current position to the destination (e.g. waypoint, geocache) or from point to point (e.g. waypoint to waypoint when navigating along a multipoint route). Direct routing is independent from trails, streets etc. on the map ("over hill and dale").
- "Cycling, Hiking, …": Autorouting to the destination, along trails, streets etc. (requires a routable map)
- "Prompted": After setting the destination you can choose the activity, e.g. "Direct Routing", "Tour Cycling", … (calculation method is automatically set to "Prompted")
Calculation Method
Depends on the activity and your preferences ("Prompted": you can select the calculation method after setting the destination)
Lock On Road
"No", except for activities like road cycling or automobile driving (snaps the position to the nearest road / trail).
Off Route Recalculation
When you detour from the calculated route the device recalculates a new route; choose the setting in dependency of the activity, e.g. "automatic" for automobile.
Avoidance Setup
Types of roads or transportations (e.g. ferry) you want to avoid.
Route Transitions
This screen is only active when you use "Direct Routing" as activity.
"Auto" is normally fine
- "Auto": automatic transition to the next point of a multipoint route
- "Manual": manual transition to the next point of a multipoint route (function "Active Route")
- "Distance": when you are within the entered distance the device leads you to the next waypoint of a multipoint route
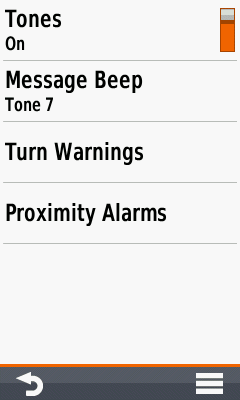
Tones
Recommendation: Tones "On"
Message Beep
Choose one, the message beep keeps you informed e.g. when the battery is low or the gps signal lost.
Turn Warnings
Choose different tones; warnings appear when navigating with routes from waypoint to waypoint or when using autorouting (turn "Early / Final Turn Warning" off when you do not need it)
Proximity Alarms
Different options, e.g. when approaching a POI (turn "Proximity Tones" off when not in use)(highly sophisticated topic, have a look Garmin warnings and alarms, in German)
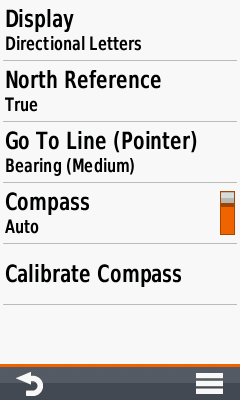
Display
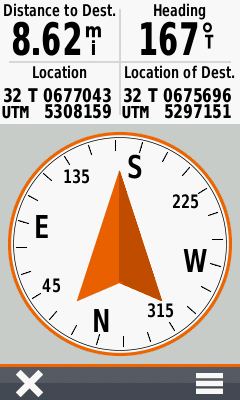
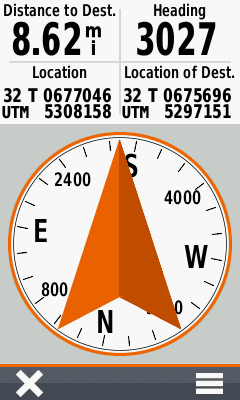
"Directional Letters" or "Numeric Degrees" are the best choices for many outdoor activities ("Mils" for special military use cases)
North Reference
Only relevant when navigating with compass and paper map (use the standard "True")
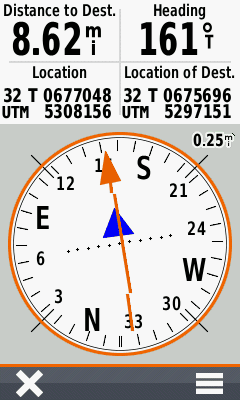
Go To Line
Use "Bearing" (small / medium / large is your choice), "Course / CDI" (Course Deviation Indicator) e.g. for sea kayaking
Compass
Use "Auto" ("Off" when you do not need the compass, might save some battery)
Calibrate Compass
Calibrate the compass at the starting point
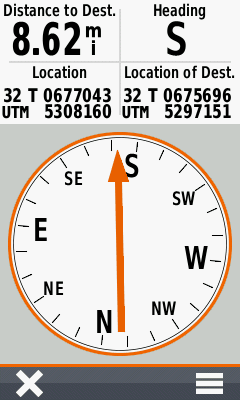
Screenshots (left to right)
- Compass: Bearing small, Directional Letters
- Compass: Bearing medium, Numeric Degrees
- Compass: Bearing large, Mils
- Compass: Course / CDI, Numeric Degrees
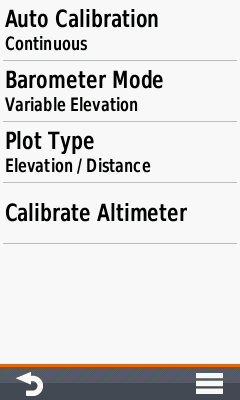
Auto Calibration
"Auto Calibration" item is not visible when "Barometer Mode" = "Fixed Elevation".
- Off: auto calibration turned off
- Once: auto calibration after starting the device (requires valid GPS position and GPS height)
- Continuous: using GPS continuously for calibration
Recommended altimeter calibration methods for outdoor activities:
- 1st choice: Manually by entering the elevation at your starting point and recalibration on tour (e.g. elevations from mountain tops)(auto calibration "off")
- 2nd choice: Manually by entering the elevation at your starting point, on tour use "continuous" auto calibration
- 3rd choice: "continuous" auto calibration ("Once" for short trips and stable weather conditions)
Barometer Mode
Altimeter: "Variable Elevation"
Barometer: "Fixed Elevation"
Plot Type
Altimeter: "Elevation / Time" or "Elevation / Distance";
Barometer: "Barometric Pressure" (= ambient pressure calibrated to sea level, not compensate for humidity or temperature, use preferably) or "Ambient Pressure" (sensor reading from the unit).
Calibrate Altimeter
Calibrate the altimeter by using one of these data:
- "Current Elevation" (e.g. from a paper or digital map)
- "Correct Pressure" (e.g. from weather data)
- "Current GPS Altitude" (from your Oregon device; tip: wait some minutes after power on)
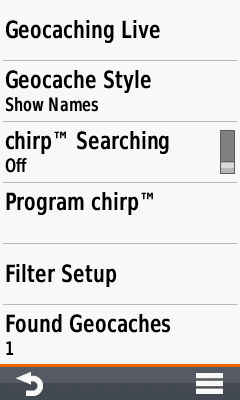
Geocaching Live
Next section!
Geocache Style
Preferably choose "Show Names" (e.g. "Welcome to Bavaria" instead of "GC2NJG9")
chirp Searching
"Off", except you are using a Garmin Chirp
Program chirp
Programming the chirp.
Filter Setup
Define filters for geocaches, e.g. for traditional geocaches
Found Geocaches
Number of found geocaches (automatically added, but you can manually edit the number by touching the menu item)
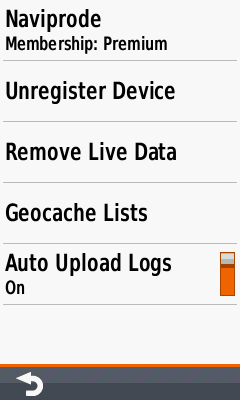
1st. item
Your Geocaching.com username
Unregister Device
Remove the device authorization from your Geocaching.com profile.
Remove Live Data
Removes the live geocache data from your device (not the manually loaded geocaches).
Geocache Lists
Lists all "Ready for Download" pocket queries; queries can be synced with the Oregon or removed from the Oregon.
Auto Upload Logs
Uploading your logs to your Geocaching.com profile (incl. comments).
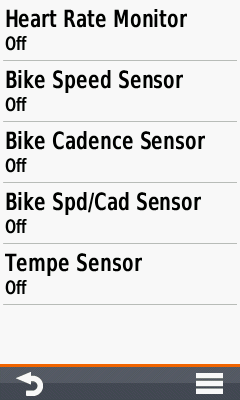
"Off", except you want to pair / use a monitor
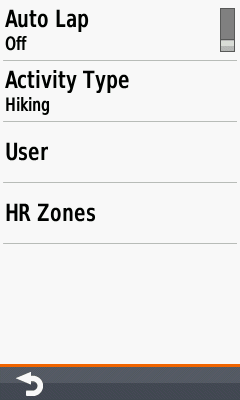
Auto Lap
A new lap will start automatically, depending on the defined distance
Activity Type
Select your current activity type (helpfull for uploading the data to Garmin Connect; e.g. you can filter your activities by the activity type)
User
Define your user profile (age, weight, …)
HR Zones
Set your heart rate zones (the Oregon calculates the zones dependant on the max. heart rate or can be individually set).
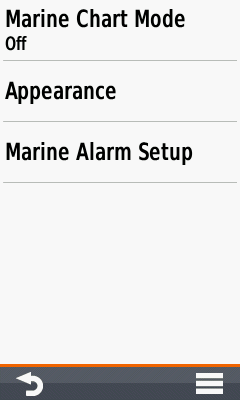
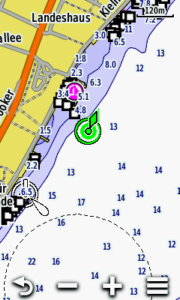
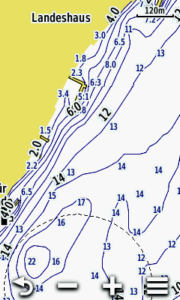
Marine Chart Mode
Depends on the used maps (e.g. Garmin BlueChart) and the activity („Fishing“, „Nautical“); otherwise turn it "off".
(screenshots: left „Nautical“, right „Fishing“)
Appearance
Different map settings (sorry, no experiences!)
Marine Alarm Setup
Different marine alarms, e.g. anchor drag alarm
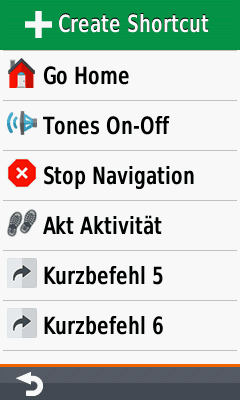
Shortcuts
Create / Change / Delete shortcuts (fast access to different functions). You can add the shortcuts to the main menu or assign them to the hardkeys. How-to (not all steps are mandatory):
- Create Shortcut
- Name: Rename as you like
- Icon: Choose an icon
- Profile: Assign it to an activity (or none)
- Setup: Assign one or more functions
- Where To?: Choose a destination (e.g. your home)
- Application: Assign an application to the new shortcut
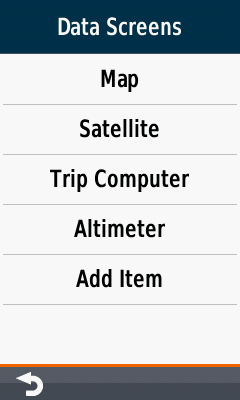
Data Screens
Main Menu Configuration: Select / Add / Remove / Move the screens you need in your main menu – but keep it simple, less is more!In classic mode you can choose between more elements
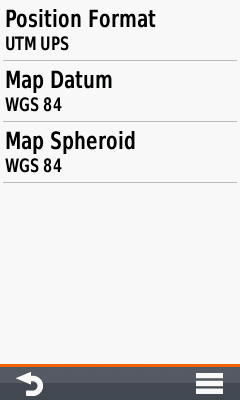
Position Format
Format for coordinates. For geocaching and marine use "hddd°mm.mmm'“, otherwise "UTM UPS“
Map Datum
“WGS 84”, except for working with paper maps
Map Spheroid
“WGS 84”, except for working with paper maps
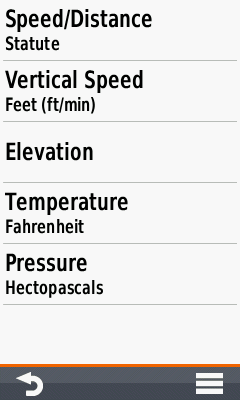
Your choice, depending on you region, activity, …
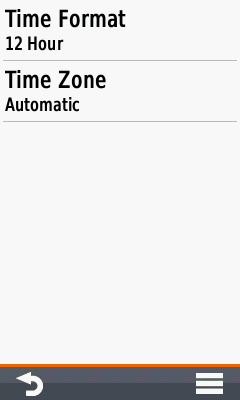
Time Format
Your choice
Time Zone
“Automatic” is recommended.
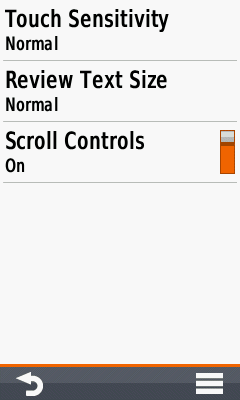
Touch Sensitivity
Use "Normal", "Glove" is recommended when wearing gloves (e.g. long finger gloves for cycling).
Review Text Size
Use "Normal", "Big" changes the font size and might be too big (e.g. for geocache descriptions).
Scroll Controls
When activated you get additional arrows for scrolling, e.g. below geocache descriptions; your choice, might be helpful when wearing gloves.
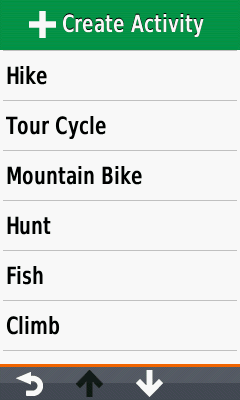
Activities
Creating / Deleting / Naming / Moving activities
- Recommendation: Leave the Garmin default activities as is and create your own activity profiles.
- How-to create an activity: Activate a default Garmin activity similar to your desired activity (e.g. "Recreational", function "Activity Change"), go to "Setup > Activities > Create Activity", your new activity has the same settings as the previously activated "Recreational" activity, then you can rename and tweak the new activity as you like.
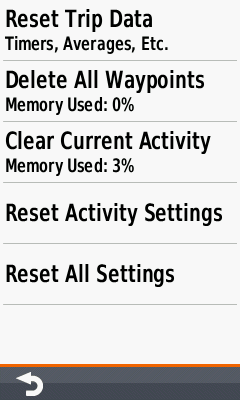
Reset Trip Data
Deleting the the trip data (e.g. "trip odometer, ascent total", but not the "odometer" = all recorded distance by the device). Does not delete the current activity (= track log).
Delete All Waypoints
Deletes all waypoints stored in the device.
Clear Current Activity
Clears the current activity (= track log), but not the trip data.
Reset Activity Type
Resets the active (actually used) activity to the default settings.
Reset all Settings
Reset all settings (restores the gps device to factory default settings).
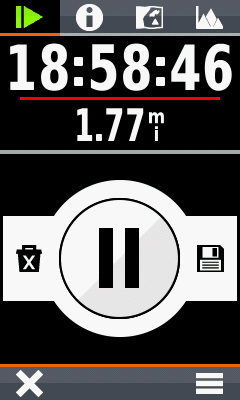
Screenshot: "Current Activity", a powerfull tool e.g. for deleting or saving the current activity (active track log) and / or trip data.
About
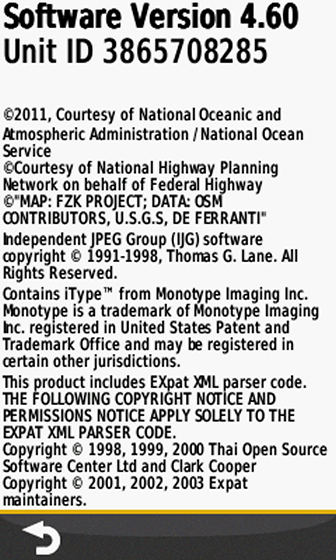
Software version, unit ID, licence informations
INFO
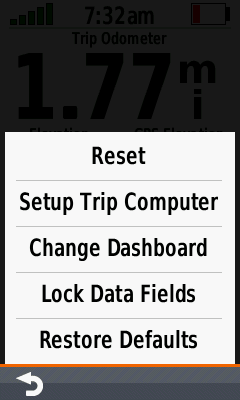
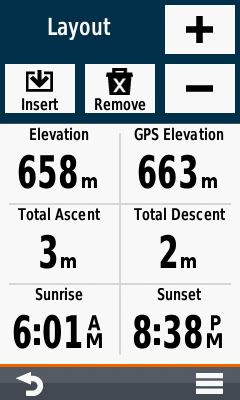
Different choices to tweak the trip computer by touching the hamburger icon in the lower right (options see 1st. screenshot).
Setup Trip Computer
You can change the overall layout, add or remove new pages and change the data field content (2nd. screenshot).
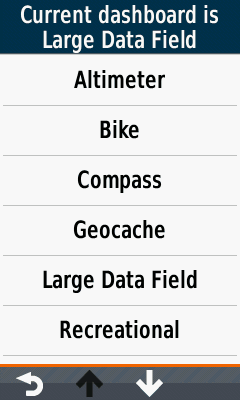
Change Dashboard
Change the dashboard, e.g. "Geocache" for geocaching (3rd. screenshot).
Hi
Garmin Oregon 750t.
Sometimes, when I ride, following the GPX track, the unit stucks and doesn’t work. It makes me pause, take out the batteries and insert again.
The GPX track contains about 1000 points.
Thanks
Hi, A very useful reference, but I have a comment on the Setup / Appearance / night and day colours.
As there is no "Background Theme" in the 700 series (there was in the 600 series), I thought the night and day colours would change the default background colour of the main screen (I’m using Classic Mode)
However, this is not the case.
As is alluded to in the Garmin online Help documentation, all the Night and Day colours change is the "selected" text or object.
Eg, when entering Coordinates using "Go to" during the day, the active numeral is highlighted in the chosen "day" colour.
The background of the main screen always remains white during the day and black at night.
Both the test in the 750t menu, and your documentation, should be amended to clarify this. (Or am I missing something)
Kind regards.
I would love to change the background day and night colours of the main screen, but have not as yet found a way to do it.
Hi,
do you please know how long Recording intervals are (Most Often/More Often/Normal/Less Often/Least Often)? I can’t find it anywhere…
Thanks!
T.
Hi,
I have never seen any informations regarding the algorithm!
Sorry
Thanks for the great info. Garmin should hire you. I have used an Oregon 450 and an old City Navigator since they came out, but the last 2 had/have a broken power "button". So I bought a factory refurbished O700 less than a week ago, and bot the current version of City Navigator NA. The Classic mode is similar to the O450–but not exactly. I use this for cycling, use Basecamp 3.3 to design my Tracks and Waypoints, then use Send To to get them on the O700. When I look at All Data in Basecamp–they are all there, BUT the Waypoints do not show up on my Map (the Track does) as they did with the O450. On the O450, I could see them as I approached them, but nothing on my O700. What do I need to do to see them–am I missing s setting?
The other problem I have is, which all worked on my O450–Only my Heart Rate strap is found in the Fitness app. My Cadence and Speed are not found. The O700 does not remember the strap either–I must pair it every ride, unlike the O450. Both have new batteries and all worked a week ago. Am I missing a configuration setting? I also have a wireless Cateye Speedometer only next to my O700–next ride I will remove it. Is there is difference in the older Garmin fitness gear, vs the newer "ANT" protocols?
Hi,
sorry for my late response … regarding the waypoints, check "zoom controls > zoom levels > user waypoints" in the "Advanced Setup" for the map (try "auto").
I checked the heart rate strap problem with an Oregon 600 (my O700 is not available), it works, the strap is connected after each restart. You did not miss a configuration setting, may be a bug? I’ve no informations regarding the ANT+ protocol (different versions?).
Regards
Hi Again
Two question:
1. When I’m riding and recording a ride, the recording is not shown on the display during the ride, which I used to see on my etrex30.
2. During a ride, how can I keep the map view to not rotates every time I stop riding? It will help me to find the real riding direction quickly.
Thanks
Avner
Hi,
1st, "Current Track" application, Info, choose "Show On Map"
2nd, I guess you should calibrate the compass.
Cheers
Pour le mode geocaching live, est-il possible de modifier le commentaire générique de mes logs qui sera télécharger sur mon profil geocaching.com
Téléchargement de vos logs sur votre profil Geocaching.com (commentaires inclus).
Je ne suis pas familier avec Geocaching Live, vous devez demander dans les forums de geocaching.
HI
WHEN I’M REPLACING BATTERIES DURING RECORDING AN ACTIVITY IN MY GARMIN OREGON 750T, THE CURRENT RECORDED ACTIVITY STOPPED, AND A NEW RECORDING BEGINS. HOW CAN I FIX IT?
A LITTLE DISAPPOINTED UNLESS SOMEBODY WILL HELP…
THANKS
Hi,
I have no Oregon 7×0 here for testing, but may be it is related to the "Recording > Auto Start" feature? Can you check?
Regards
Hi
I changed it to Auto start and it works well. Thank you.
I have a Garmin Oregon 700 and 3 horizontal black lines have appeared on the screen. They are visible whether the device is on or off. Do you know why this could be or a fix? Help would be much appreciated. Thank you.
How do I download a Recording from my Garmin Oregon 750? Thanks!
connect the Oregon to a desktop, in mass storage mode you can open the folder Garmin/GPX or Garmin/Archive with your records
Thank you for the insight much appreciate.
When I am planning a route direct mode, you get on the map point 001,002,003 etc.
Following some videos on u tube these change to the os coordinates, how do I do this please
Paddy
Where can I find instructions for using the Garmin 7xx in my car. Garmin offers a carkit for this series by the way.
Hi, how to I activate the turn warnings or off course alerts when following a route or track
Hi,
you get turn warnings and off course alerts only when following a route, not a track! Use an activity like "Cycling" and use "prompted" or "automatic" for "Off Route Recalculation" (Routing settings).
Cheers
Do you have to save a route after backtracking and can you reuse the same route again
You mean "TracBack"? You have to save the tracklog (current activity) after returning to the beginning.
Hi. Thanks for a very informative article. Under the Altimeter settings, will you please clarify in your first choice, why turn off continuous calibration after the initial manual calibration? Seems like turning on continuous calibration would lead to better accuracy. Thanks!
I’m having an anomaly with my Oregon 700. I can’t see the installed maps: they are all almost empty, that is, it seems to display only the global map, yet on BASECAMP I see them well. Maybe I should try reinstalling all oregon 700 software but I don’t know how to do it.?
Sorry for the incorrect entry of my comment
Hi,
no, I would not reinstall the software! I guess you did not activate the additional maps in the map settings ("Configure Maps").
Cheers
Why is there no index? Tried using search but it goes outside of the page and gives irrelevant info.
This is precisely the problem: whether I activate the maps or that I deactivate them, the display always remains the same, basically it is as if I had only activated Worldwide DEM Basecamp map (while the "Openfietsmaps Lite" and "OSM Generic maps routable" I display them well on the PC with BaseCamp but not in my Oregon).. Where is the problem?
Thank you very much for this, very useful. How do I know whether I am using the most recent software on my Garmin Oregon 700. Currently I am using Software Version 4.20 and where do I get the most recent version?
Hi, you must install Garmin WebUpdater or Garmin Express – the software tells you if you need to update!
https://www8.garmin.com/products/webupdater/howtoinstall.jsp
https://support.garmin.com/en-US/?faq=vxmflP3DAk2ajAJSmzVSW6
Cheers
Hi there, really helpful for setting up my new Garmin Oregon 750t. Having one problem and wondered if you can help. In battery save mode it turns off fine pressing the button on the side, but when I press the button again to retrieve map it is only showing a blank white screen. Would really appreciate advice. Many thanks
Hi,
yes, I have heard about this problem, but we did not found a solution (may be a strange combination of settings?); do you have the latest software installed? If it is a new device i would send it back.
cheers
some news, this problem should be solved with the last software-update!
Are there any plans for a Montana 680T version ?
Thanks for such great sharing. This really helps me a lot as a new user of the Oregon 750 on the set up.
Wonder u can give me a tip on how to increase the contrast of the contour lines against the background which is pale green in colour when using the topography map for hiking.
Pls go to the map of Penang Island, Malaysia & find the following coordinates:
N 05°25.984′
E 100°16.114′
(Old Crag Hotel Trail)
U should be able to see that because of the colour of the contour lines against the background colour of the hill make them hard to differentiate.
Hope u can help me out of this problem.
Thank you.
solution would be to use a different map, may be another Garmin map or one from OpenStreetMap: https://www.navigation-professionell.de/en/free-maps-garmin-gps/
cheers
I have new oregon 750t. Why theris no selection campings under lodging menu?
Hi,
no, it’s not planned!
Thank you for a very complete and informative page!